How We Chose
We selected each sensory food play activity and tool based on safety, developmental benefits, ease of setup, ingredient accessibility, and positive feedback from U.S. families and educators. Our focus was on options that cater to a range of ages, encourage curiosity around food, and support sensory development—all while keeping mess and clean-up manageable for parents.
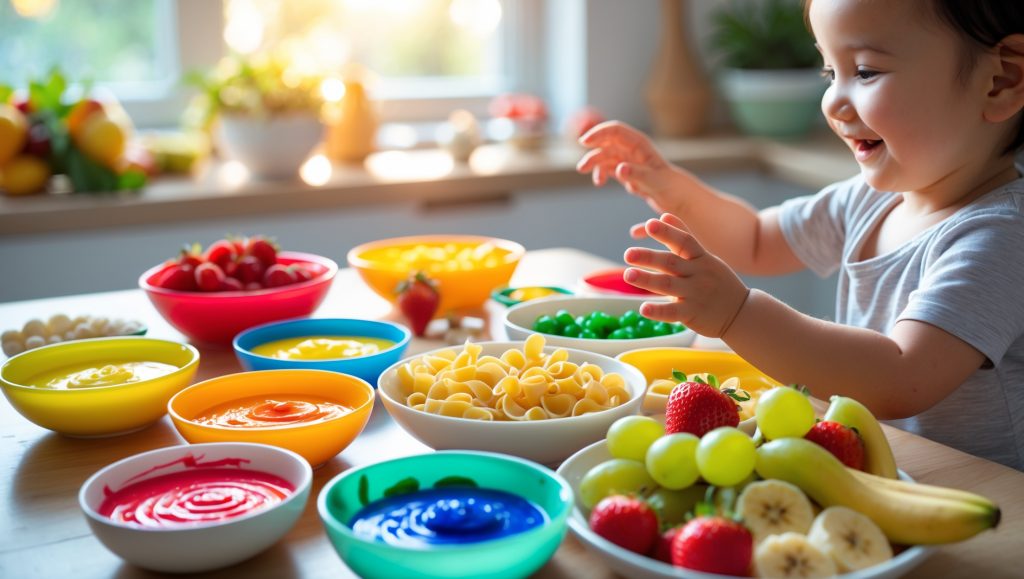
#1 Cooked Pasta Sensory Bin — Classic, Colorful, and Edible Play
Why it stands out
Soft, slippery, and endlessly versatile, cooked pasta sensory bins are a beloved classic for good reason. With a few drops of food coloring, you can transform ordinary pasta into a rainbow of textures and colors, inviting little ones to squish, squeeze, and sort. This edible option is safe for babies who explore with their mouths and offers older toddlers rich opportunities for imaginative play.
Best for
- First sensory play experiences
- Group playdates or solo exploration
Key notes
- Age/Stage: 6 months+ (with supervision)
- Materials/Ingredients: Cooked pasta (any shape), food coloring (optional), olive oil (for less stickiness)
- Strengths: Edible, easy to prepare, vibrant, supports fine motor skills
- Trade-offs: Can be messy; pasta must be fully cooled and checked for temperature
#2 Yogurt “Paints” — Tasty, Mess-Free Finger Painting
Why it stands out
Yogurt paints let babies and toddlers paint, smear, and create with a food that’s safe to taste. Just stir in natural food coloring or fruit purees to plain yogurt, and offer a canvas (like a highchair tray or parchment paper). This activity supports early art exploration and encourages positive associations with food textures.
Best for
- Babies who mouth everything
- Indoor play on rainy days
Key notes
- Age/Stage: 6–18 months
- Materials/Ingredients: Plain yogurt, natural food coloring or fruit purees, paper or tray
- Strengths: Safe to eat, easy clean-up, encourages sensory exploration and creativity
- Trade-offs: Dairy allergies require substitutions (e.g., coconut yogurt); potential for slippery mess
#3 Edible Sand — Grainy, Pourable Fun
Why it stands out
Homemade edible sand made from crushed cereal or graham crackers gives children the chance to dig, pour, and bury objects in a safe, taste-friendly way. This sensory bin is especially engaging for toddlers fascinated by scooping and pouring, and it’s gluten-free adaptable.
Best for
- Toddlers who love construction or beach play
- Outdoor sensory bins
Key notes
- Age/Stage: 12 months+
- Materials/Ingredients: Unsweetened cereal or crackers, food processor/blender
- Strengths: Edible, easy to make at home, supports hand-eye coordination
- Trade-offs: Fine particles can scatter; watch for allergies
#4 Fruit and Veggie Stamps — Nature’s Art Tools
Why it stands out
Sliced apples, potatoes, and peppers become natural stamps for little hands. Use them with edible “paint” like pureed fruits or yogurt for artistic sensory fun that introduces new foods in a playful, pressure-free way.
Best for
- Introducing new produce
- Children with creative streaks
Key notes
- Age/Stage: 18 months+
- Materials/Ingredients: Firm fruits/veggies, edible paint (pureed fruit, yogurt)
- Strengths: Encourages food familiarity, supports creativity, easy setup
- Trade-offs: Some fruit/veg may stain; requires supervision for small pieces
#5 Sensory Spoons and Scoops — Tools for Tactile Learning
Why it stands out
Chunky, easy-to-grip spoons and scoops allow little ones to practice transferring, scooping, and pouring foods like cooked rice or beans. These tools build fine motor skills while keeping hands less messy, and they can be used again and again in different sensory bins.
Best for
- Children who avoid messy hands
- Developing self-feeding skills
Key notes
- Age/Stage: 9 months+
- Materials/Ingredients: BPA-free plastic or silicone spoons, cooked rice/beans
- Strengths: Reusable, supports coordination, versatile
- Trade-offs: Requires adult supervision for small parts/foods
#6 Gelatin Sensory Tray — Wiggly, Jiggly Exploration
Why it stands out
Gelatin trays offer a unique, squishy texture for poking, scooping, and hunting for hidden objects (like blueberries or soft toys). The cool, bouncy feel is irresistible for toddlers, and you can use unflavored gelatin with fruit juice for a dye-free option.
Best for
- Hot summer days
- Children who crave unique textures
Key notes
- Age/Stage: 12 months+
- Materials/Ingredients: Unflavored or flavored gelatin, fruit pieces, tray
- Strengths: Sensory-rich, edible, customizable
- Trade-offs: Not suitable for vegan/vegetarian diets; can be slippery
#7 Oatmeal Dough — Moldable, Safe, and Simple
Why it stands out
Homemade oatmeal dough is a quick, taste-safe alternative to commercial playdough. Just mix oats, flour, water, and a bit of oil for a soft, moldable texture. Add cinnamon or vanilla for gentle scent exploration. Kids can squish, roll, and even taste tiny bits worry-free.
Best for
- Allergy-sensitive households
- Open-ended sensory play
Key notes
- Age/Stage: 9 months+
- Materials/Ingredients: Oats, flour, water, oil, optional scents
- Strengths: Edible, easy to make, customizable scents
- Trade-offs: Short shelf life; may dry out if left uncovered
#8 Rainbow Rice — Eye-Catching, Pourable Play
Why it stands out
Colored rice sensory bins are visually striking and excellent for scooping, pouring, and sorting. Use vinegar and food coloring to dye uncooked rice, creating a rainbow effect. It’s a dry, less sticky option that can be stored and reused for months.
Best for
- Older toddlers and preschoolers
- Color sorting and counting games
Key notes
- Age/Stage: 18 months+ (with supervision to avoid mouthing)
- Materials/Ingredients: Rice, vinegar, food coloring, zip bags
- Strengths: Long-lasting, vivid colors, reusable
- Trade-offs: Not for babies who mouth everything; rice grains can scatter
#9 Muffin Tin Taste Tests — Mini Food Adventure
Why it stands out
Arrange bite-sized samples of fruits, veggies, dips, or crunchy snacks in a muffin tin. This activity turns snack time into a sensory exploration, inviting kids to touch, smell, and taste a variety of foods without pressure. It’s a fun way to introduce new flavors and textures in a safe, familiar format.
Best for
- Children hesitant to try new foods
- Picnic or snack time
Key notes
- Age/Stage: 12 months+
- Materials/Ingredients: Muffin tin, assorted safe snacks, fruits, dips
- Strengths: Encourages food variety, supports autonomy, low-prep
- Trade-offs: Small items require supervision; may need creative combos for picky eaters
Buying Tips
When choosing sensory food play tools or ingredients, opt for age-appropriate, non-toxic, and easily washable materials. Look for BPA-free plastics and food-grade dyes. For edible sensory bins, always check for common allergens, and introduce new foods one at a time when possible. Consider starting with small quantities to minimize waste and observe your child’s reactions. Storage containers with tight lids can help you reuse dry sensory materials like rice or pasta, making setup even easier next time.
Verdict
Sensory food play isn’t just about mess—it’s a powerful avenue for learning, curiosity, and confidence around eating. The activities and tools highlighted here are practical, safe, and developmentally supportive for families in 2025. From classic cooked pasta bins to muffin tin taste tests, these options encourage children to explore new textures, colors, and flavors at their own pace. With simple setup and minimal prep, you can make food play a regular, joyful part of your home routine.
FAQ
+What age is best to start sensory food play?
+How can I reduce the mess from food sensory play?
+Are there allergy-friendly sensory food play ideas?
+How often should I do sensory food play with my child?
+What if my child is hesitant to touch or taste new foods?
+Can sensory food play help with picky eating?
+How do I clean up after sensory food play?

Sensory food play is more than just fun—it’s a powerful way for young children to explore textures, colors, and tastes while developing fine motor skills and positive attitudes toward food. In 2025, educators and parents alike are embracing a wide range of food-based sensory activities that encourage curiosity and creativity. From squishing cooked pasta to painting with yogurt, these experiences support learning in a safe, supervised environment. The best activities use everyday ingredients, making them accessible and budget-friendly, while also introducing children to new foods in a stress-free way.
Expert-recommended tools such as child-safe knives, silicone sensory mats, and divided plates help structure play and keep things manageable. Always supervise closely, and tailor activities to your child’s developmental stage and any dietary restrictions. Remember, the goal isn’t just mess—it’s meaningful exploration that can spark lifelong positive relationships with food.
- Cooked spaghetti or rice bins for tactile digging and scooping
- Edible finger paint with yogurt and food coloring
- Fruit and veggie stamping for creative art projects
- Child-safe knives for safe, independent food prep practice
For the cooked pasta sensory bin, how do you recommend containing the mess, especially when my 10-month-old likes to throw food on the floor? Are there any tips for easier clean-up or particular surfaces that work best?
It’s totally normal for a 10-month-old to explore by throwing food, and wanting to keep clean-up manageable makes sense. Try setting up the pasta sensory bin on a large, washable mat or plastic tablecloth to catch spills. Use a shallow bin with high enough sides to help contain the pasta. Consider having your child wear a smock or old clothing, and keep a damp washcloth nearby for quick wipe-ups. Position the activity in an easy-to-clean area, like the kitchen floor, and supervise closely for safety, especially since slippery pasta can be a fall hazard. This isn’t medical advice; if you’re concerned, check in with your pediatrician.
I noticed you mention using yogurt as a safe paint, but my little one has a dairy allergy. Would coconut yogurt hold up as well, or do you have another favorite non-dairy option for finger painting that is still edible?
You’re right to look for safe, fun alternatives for your child’s dairy allergy. Coconut yogurt is a good substitute for dairy yogurt in sensory painting—its texture is similar, and it’s generally safe for finger painting as long as your child isn’t sensitive to coconut. You could also try smooth applesauce, oat yogurt, or pureed banana for edible, allergen-friendly painting. Always supervise closely, especially with new foods, and check that there are no small mix-ins or added sweeteners. This isn’t medical advice; if you’re concerned, check in with your pediatrician.
Can the fruit and veggie stamp activity be adapted safely for younger babies under a year old, or is there a specific age where it’s best to introduce that type of play? I’d like to encourage curiosity about produce but want to avoid choking hazards.
You’re thoughtful to encourage curiosity about fruits and veggies while keeping safety in mind. For babies under one year, you can adapt the fruit and veggie stamp activity using large, easy-to-grasp produce like halved apples or potatoes and supervise closely to prevent mouthing or biting. Use edible, baby-safe paints (like plain yogurt with natural food coloring) and avoid small produce or any items that could break apart easily. Keep sessions brief and always watch your baby during play. This isn’t medical advice; if you’re concerned, check in with your pediatrician.
Are any of these sensory food activities particularly good for encouraging independence during potty training? I’d love to know if one supports self-care skills or confidence in young children.
It’s wonderful that you’re thinking about how sensory food play can support your child’s independence during potty training. Activities that involve scooping, pouring, or manipulating soft foods—like using spoons with yogurt or mashed potatoes—can help your child practice the same hand skills needed for self-wiping and managing clothing. Let your child explore these textures independently, but supervise closely to ensure safety, especially if they’re under three or tend to mouth objects. Offering wipes during play can also mimic self-care routines in a low-pressure way. This isn’t medical advice; if you’re concerned, check in with your pediatrician.
The edible sand activity sounds fun, but I’m worried about choking hazards with crushed crackers or cereal. For younger toddlers just over 12 months, what texture should I be aiming for to make it safer for them to explore?
Your concern about choking hazards for young toddlers is very valid. For children just over 12 months, aim for an edible sand texture that is very finely ground, almost powdery—think more like flour or fine breadcrumbs than chunky pieces. Use a food processor to pulse crackers or cereal until you reach a soft, smooth consistency. Supervise closely during play, and only offer small amounts at a time. Avoid ingredients with hard or sharp edges, and watch for any potential allergens. This isn’t medical advice; if you’re concerned, check in with your pediatrician.
If my 15-month-old tends to get upset when his hands are messy, are there any sensory food activities from your list that are especially good for easing kids into this kind of play? I’d love suggestions for a gentle introduction to help him feel comfortable.
It’s understandable to want your little one to feel comfortable exploring new sensations. For a gentle introduction, try dry food play first—offer a tray of uncooked rice or cereal that he can touch with fingers or scoop with a spoon. You might also start with sealed sensory bags filled with pudding or applesauce, letting him squish the bag without getting messy. Gradually move to soft, less sticky foods like peeled bananas or steamed carrot sticks if he shows interest. Let him watch you touch the foods, and join in at his own pace. Always supervise, and avoid small foods that could be choking hazards. This isn’t medical advice; if you’re concerned, check in with your pediatrician.
I was wondering if there are specific pasta shapes that are easier for 2-year-olds to handle during sensory play, or if anything works as long as it’s cooked soft enough.
—choosing the right pasta shape can make sensory play more fun and manageable for your toddler. For 2-year-olds, larger shapes like rotini, penne, or rigatoni are easier to grasp and less of a choking risk than small shapes. Always cook pasta until it’s very soft, rinse it to cool, and supervise closely during play. Avoid very small or thin pasta (like orzo or spaghetti) to reduce choking hazards. If your child has food allergies or sensitivities, pick pasta that’s safe for them. This isn’t medical advice; if you’re concerned, check in with your pediatrician.
My baby is hesitant about wet or slippery textures, like yogurt or cooked pasta. Are there sensory activities you recommend from your list for babies with mild texture aversions, or ways to gently encourage them to participate?
It’s completely normal to worry when your baby seems unsure about wet or slippery foods. Try starting with dry textures, such as rice cereal or oat flakes, which feel less overwhelming. Gradually introduce slightly moist foods, like mashed banana, letting your baby touch and play at their own pace. You can model touching the foods yourself to show it’s safe. Offer tools like spoons or silicone brushes so your baby can explore without having to touch the food directly. Always supervise closely, and keep portions small to avoid choking hazards. This isn’t medical advice; if you’re concerned, check in with your pediatrician.
Is it safe to save and reuse cooked pasta or edible sand from one day to the next, or do you recommend making a fresh batch each time we set up a sensory bin?
It’s great that you want to make sensory play both fun and safe for your child. For cooked pasta or edible sand, it’s safest to make a fresh batch each time, especially for children under three, since bacteria can grow quickly even if items are refrigerated. If you do reuse, store materials in airtight containers in the fridge and check for any signs of spoilage or changes in texture before offering them again. Always supervise closely and avoid reusing if your child has put the items in their mouth. This isn’t medical advice; if you’re concerned, check in with your pediatrician.
We have a family history of food allergies. Are there alternative safe options for the yogurt paints and edible sand for kids who might have dairy or gluten sensitivities?
You’re wise to consider allergies before sensory food play. For yogurt paints, use unsweetened coconut or oat-based yogurts that are labeled dairy-free and allergen-friendly. For edible sand, try finely ground gluten-free cereal (like plain rice cereal) or crushed rice cakes as a base—just check ingredient lists for potential allergens. Always supervise closely and introduce new foods one at a time to watch for reactions. Choose smooth, easy-to-swallow textures for young children and avoid adding honey for babies under one year. This isn’t medical advice; if you’re concerned, check in with your pediatrician.
Do you have any advice on how to safely store leftover homemade edible sensory materials for reuse later in the week, like the colored pasta or edible sand?
That’s a thoughtful question—safe storage is important for sensory play materials, especially if you plan to reuse them. First, let the materials dry completely before storing to prevent mold. Place them in airtight containers or zip-top bags, and label with the date made. Store in the refrigerator if ingredients are perishable or if your home is humid. Before each reuse, check for changes in smell, texture, or color and discard if anything seems off. Make sure young children are supervised during play and keep storage out of their reach. This isn’t medical advice; if you’re concerned, check in with your pediatrician.
If my child is younger than the recommended age for some sensory kits, are there particular adjustments or substitutions you suggest, especially when subscribing to boxes that may include small parts or less edible options?
It’s great that you’re thinking about how to make sensory food play safe and fun for your younger child. First, remove any small parts or items that could pose a choking risk—always supervise closely, especially with sensory kits not designed for babies or toddlers. Substitute non-edible pieces with large, edible items like cooked pasta, vegetable sticks, or fruit pieces. Use homemade sensory bases like mashed potatoes or yogurt for safer, taste-safe exploration. Avoid allergens and check for any strong scents or dyes that could irritate sensitive skin. This isn’t medical advice; if you’re concerned, check in with your pediatrician.
Some days we have limited time before dinner or naps. Which of these sensory food activities would be best for a quick setup and easy clean-up if I only have about 15 minutes for play?
It’s great that you want to fit in sensory play even during busy days. For a quick, low-mess option, try activities like dry pasta scooping, cereal pouring, or exploring soft fruits with a damp washcloth (for easy clean-up). Lay down a mat or towel underneath to help contain spills. Choose foods and tools that are age-appropriate to prevent choking hazards, and supervise closely. Wipe hands and surfaces right after to keep clean-up simple. This isn’t medical advice; if you have health or safety concerns, please check in with your pediatrician.
I noticed you included both homemade cereal sand and fruit purees as sensory tools. If I’m hoping to boost my child’s iron intake while playing, is there a meaningful difference between using a fortified cereal versus a fruit or veggie puree for the activity?
You’re being thoughtful about your child’s nutrition while encouraging sensory play, which is wonderful. Fortified cereals generally provide more iron than most fruits or veggie purees, so using them for play can be a simple way to boost iron intake if your child mouths or tastes the cereal sand. For extra safety, choose cereals with low sugar and make sure pieces are small enough to prevent choking. With purees, unless they’re made from iron-rich veggies like spinach or certain beans, the iron content is usually lower and less easily absorbed. Always supervise closely. This isn’t medical advice; if you’re concerned, check in with your pediatrician.
You mentioned using food coloring in the pasta bins. Is there a specific type or brand of food coloring you recommend for babies under 18 months, or is natural coloring better, especially considering possible allergies?
You’re right to be mindful about food coloring for babies under 18 months. For little ones, natural food-based colorings—like beet juice for pink or spinach water for green—are safest, especially if they might mouth the pasta. If you use store-bought food coloring, choose brands labeled as food-safe and free from common allergens, and use only a tiny amount. Always supervise closely to prevent choking and make sure the pasta isn’t too hard. This isn’t medical advice; if you notice any reaction or have allergy concerns, please check in with your pediatrician.
My baby is starting solids but can be sensitive about textures. Is it better to introduce the yogurt painting activity or the pasta bin first for a child who’s hesitant to touch slippery foods? Any suggestions to make it less overwhelming for her?
You’re thoughtful to consider your baby’s sensory sensitivities as she explores new foods. For a child hesitant about slippery textures, starting with the pasta bin may be less overwhelming, especially if you use cooked pasta that’s just slightly moist rather than very slick, or even offer dry pasta to begin. Try offering the pasta in small amounts first, letting her explore with a spoon or her fingers at her own pace. If you decide to try yogurt painting later, keep the surface small and offer a washable brush so she isn’t required to touch it directly. Always supervise closely and ensure everything is age-appropriate and safe to mouth. This isn’t medical advice; if you’re concerned, check in with your pediatrician.
If a child is particularly sensitive to certain food textures, like slimy or grainy sensations, would you suggest starting with one of these activities over another to help ease them in?
It’s completely understandable to want to support your child if certain food textures are uncomfortable for them. Start with dry and familiar textures, like dry pasta, rice, or crackers, before gradually introducing slightly new ones. Offer plenty of opportunities for your child to observe or touch the foods with their hands, without pressure to eat. Allow them to use tools like tongs or spoons to explore at first, which can feel less overwhelming. Always supervise closely to prevent choking or allergic reactions, and choose age-appropriate, non-choking hazard foods. This isn’t medical advice; if you’re concerned, check in with your pediatrician.
Is it safe for a 7-month-old to play with yogurt paints if she is not yet eating dairy regularly? Should I start with only coconut yogurt to be safe, or can I offer plain whole milk yogurt right away if she has no history of allergies?
It’s great that you’re thinking carefully about introducing new sensory play materials to your baby. At 7 months, it’s safest to treat yogurt paints just like any new food, offering plain whole milk yogurt in a small amount to check for reactions, as long as your baby has started solids and has no dairy allergy history. Try a tiny taste first before using it for play, and always supervise closely since babies this age tend to mouth everything. If you prefer, coconut yogurt is a gentle alternative until you’re more comfortable with dairy. This isn’t medical advice; if you’re concerned, check in with your pediatrician.
Do you recommend alternating between these food-based sensory activities and non-food tools from a subscription to keep things fresh, or is it better for development to establish more of a routine with one or the other?
It’s great that you want to keep sensory play engaging and developmentally supportive for your child. Alternating between food-based activities and non-food tools can offer variety, which helps children explore different textures, smells, and materials. You might try a simple schedule, like using food play two days a week and non-food tools on others, so your child both benefits from routine and stays curious. Watch for signs of overwhelm—young children, especially under age three, may need more repetition to feel secure. Always supervise closely with food play to manage allergies and choking risks. This isn’t medical advice; if you’re concerned, check in with your pediatrician.
How long can I keep the edible sand made from cereal or crackers before it goes stale or unsanitary? I want to set up a big bin but not sure if I have to remake it every day or if it lasts for a few sessions.
It’s great that you’re thinking about safety and freshness for sensory food play. Edible sand made from cereal or crackers can usually be kept for up to 2–3 days if it’s stored in an airtight container between sessions and hands are washed before play. Discard it sooner if it gets wet, sticky, or if little ones mouth or sneeze on it. For babies and toddlers, always supervise closely and check for spoilage, as their immune systems are still developing. This isn’t medical advice; if you’re concerned, check in with your pediatrician.
Is it safe to let siblings of different ages participate together, or would you recommend adjusting certain activities based on their developmental stages to avoid any safety risks?
You’re thoughtful to consider safety and developmental differences when siblings play together. It’s usually fine for kids of different ages to join in sensory food play, but adjust activities to the youngest child’s needs. Avoid small, hard foods (like popcorn or whole grapes) if any child is under 4 to prevent choking. Supervise closely, especially if baby siblings might put things in their mouths. Choose textures everyone can enjoy without allergens or irritants, and encourage older children to help role-model safe play. This isn’t medical advice; if you’re concerned, check in with your pediatrician.
If you had to choose only one of the sensory food play activities for a child who is hesitant about new food textures, which one would you recommend starting with, and why?
It’s very understandable to want a gentle way to help your child become more comfortable with new food textures. For a hesitant child, I recommend starting with dry pasta or rice scooping and pouring activities. These materials are less messy, easy to clean up, and typically feel less overwhelming than wet or sticky foods. Begin by letting your child explore with their hands or use cups and spoons, encouraging them to simply play without pressure to taste. This builds positive associations with food handling in a low-stress way. Always supervise closely to prevent any risk of choking, especially for toddlers. This isn’t medical advice; if you’re concerned, check in with your pediatrician.
If I wanted to try the cooked pasta sensory bin with two kids who are different ages—one is almost 7 months and the other just turned three—would you suggest any changes to the setup or rules to keep it safe and engaging for both?
It’s great that you want to engage both of your children in sensory play together. For your 7-month-old, be sure to use larger pasta shapes (like rigatoni or penne) to reduce choking risk and supervise closely, as mouthing is common at this age. Keep the pasta plain—avoid salt, sauces, or small mix-ins—and place your baby in a high chair or on a clean mat. For your three-year-old, you can offer safe tools like tongs or cups for scooping and sorting. Set up separate play areas or a divided bin if needed, so each child can explore at their own pace. This isn’t medical advice; if you’re concerned, check in with your pediatrician.
When setting up the cooked pasta sensory bin, do you suggest avoiding certain pasta shapes that might be more of a choking risk, or is any shape safe as long as the pasta is soft and cut up?
You’re being thoughtful about safety, which is so important with sensory play. For young children, especially those under 3, it’s best to use larger pasta shapes like rotini or penne and make sure they’re cooked until very soft. Avoid small shapes like ditalini or any pasta that could fit entirely inside a child’s mouth, even if cut up. Always supervise closely, and consider cutting longer shapes like spaghetti into short pieces. This isn’t medical advice; if you’re concerned, check in with your pediatrician.
Can you clarify if the yogurt ‘paint’ activity is suitable for outdoor play, or would it attract too many bugs during warmer months? I want to encourage messy play but worry about cleanup and pests outside.
It’s great that you want to encourage messy, sensory play while thinking about practical concerns. Yogurt ‘paint’ is safe and fun for toddlers, but outdoors in warm weather, it can attract insects like ants and flies. If you’d still like to try it outside, consider early mornings or cooler days, use a washable mat for easier cleanup, and supervise closely. Alternatively, reserve yogurt painting for indoors and pick less sticky materials—like colored water—for outdoor art. This isn’t medical advice; if you’re concerned, check in with your pediatrician.
My daughter gets overwhelmed by sticky textures like yogurt. Would any of the activities you mentioned be better for kids who are sensitive to that kind of sensory input?
It’s understandable to want sensory play options that feel comfortable for your daughter. For children sensitive to sticky textures, start with dry or easily cleaned materials—try dry pasta, rice, or fabric scraps for scooping and sorting. Use tools like tongs or spoons so she can participate without direct hand contact. Gradually introduce new textures at her pace, respecting when she wants to stop. Always supervise closely and check that all materials are non-toxic and safe for her age. This isn’t medical advice; if you’re concerned, check in with your pediatrician.
You mention yogurt paints as an activity for younger toddlers. If my 3-year-old still mouths everything, is it appropriate to offer this, or should I try something suggested for older kids?
It’s completely understandable to wonder about safe activities when your child still mouths things at age three. Yogurt paints can be a wonderful option because they are non-toxic and usually safe if tasted, making them suitable for children who still explore with their mouths. To use them safely: 1) Choose plain, unsweetened yogurt to avoid added sugars and potential allergens. 2) Use natural food coloring if you want to add color. 3) Supervise closely to prevent large mouthfuls. 4) Avoid other paint activities with small parts or inedible materials until your child is ready. This isn’t medical advice; if you’re concerned or your child has allergies, check in with your pediatrician.
We have laminate floors that echo, so I’m curious which of these food play ideas you’ve found to be the least messy and easiest to clean up early in the morning when I am still half-awake. The pasta sensory bin sounds fun, but how would you contain the mess?
It’s understandable to want a low-mess sensory play option, especially with echoing floors and early mornings. For easy clean-up, try using large, shallow trays or plastic storage bins to contain dry foods like pasta—this keeps most of the mess inside. Place an old towel or sheet underneath the play area to catch stray bits for quick pick-up. Limit the amount of food in the bin to reduce scattering, and encourage play while seated to help keep things contained. For toddlers, use larger pasta shapes to avoid choking hazards and always supervise. This isn’t medical advice; if you have specific concerns, check in with your pediatrician.
For families on a tight budget, which sensory food play activity from your list tends to be the most affordable and long-lasting for twins? I’m hoping to invest in something that works well for repeated use without buying lots of extra materials.
You’re being thoughtful about stretching your budget while supporting your twins’ sensory play. From the list, dry pasta or rice sensory bins are typically the most affordable and durable option—you can reuse the same materials many times, and twins can play together. Start with a large plastic bin and fill it with uncooked rice or pasta, adding a few measuring cups or spoons from your kitchen. Always supervise play to prevent choking, especially for toddlers, and choose age-appropriate tools. Replace the filler if it gets wet or dirty. This isn’t medical advice; if you have concerns, check in with your pediatrician.
For families with limited kitchen storage, are there any tips for rotating or reusing ingredients between these sensory activities rather than having to set up and clean up completely separate bins each time?
It’s understandable to want sensory play to fit smoothly into your space and routine. Try using one large, shallow bin for all activities, rinsing and drying between uses. Store dry ingredients like rice, beans, or pasta in airtight containers for easy reuse. For wet activities, line your bin with a washable cloth or use disposable liners. Limit each session to just 1-2 ingredients to reduce mess and cleanup. Always supervise to ensure safety, especially with small or slippery items. This isn’t medical advice; if you have concerns, check in with your pediatrician.
Is it OK to use gluten-free pastas or cereals for the cooked pasta bins and edible sand? Sometimes my child’s preschool group has strict allergy guidelines, and I’m looking for safe alternatives.
You’re absolutely right to consider safe alternatives for group play, especially with strict allergy guidelines. Gluten-free pastas and cereals can be great substitutes for cooked pasta bins or edible sand—just make sure they don’t contain other common allergens like soy or nuts. Cook the pasta until it’s soft and cool before play, and crush cereals well to avoid choking hazards. Always supervise young children during sensory food play and check with your preschool group for any specific ingredient restrictions. This isn’t medical advice; if you’re concerned, check in with your pediatrician.
Could you recommend any dairy-free alternatives for the yogurt paints that are also safe and easy for younger toddlers to use? My child has a sensitivity to cow’s milk, so I want to be careful with substitutions.
It’s so thoughtful to look for safe, dairy-free options for your child’s sensory play. For yogurt paints, you might try using plain, unsweetened coconut yogurt or oat yogurt, making sure they don’t contain added sweeteners or potential allergens. Another alternative is thick applesauce or pureed banana for a similar texture. Always supervise closely, as younger toddlers are likely to taste the mixture, and check ingredient labels for hidden allergens. Test a small amount on your child’s skin first if you’re concerned about reactions. This isn’t medical advice; if you have ongoing concerns, please check in with your pediatrician.
My toddler sometimes resists foods with certain textures, which can make mealtimes tough. Would activities like edible sand or fruit and veggie stamps be better for helping 2.5-year-olds become more comfortable with different textures, especially during potty training transitions?
It’s understandable to feel challenged when your toddler resists certain food textures, especially during times of change like potty training. Sensory food play—such as edible sand or fruit and veggie stamps—can gently support your 2.5-year-old in exploring new textures in a fun, low-pressure way. Start by letting your child touch, squish, or play with these foods without any expectation to eat them. Always supervise closely and use age-appropriate, safe ingredients to avoid choking hazards and allergens. Invite your child to help make the ‘sensory food’ together, fostering curiosity and comfort. This isn’t medical advice; if you’re concerned, check in with your pediatrician.
I noticed your yogurt paint idea, but are there any suggestions for non-dairy alternatives that have a similar consistency? My toddler is very sensitive to smells and textures, so I’m curious if coconut yogurt really works the same or if there’s something else you recommend.
It’s great that you’re considering your toddler’s sensitivities while exploring sensory play. For a non-dairy yogurt paint, coconut yogurt can work, but its texture is sometimes thinner and the scent stronger than dairy yogurt. You might try plain oat or soy yogurt, which tend to be milder in smell and similar in consistency. Unsweetened applesauce mixed with a little cornstarch can also create a smooth, spreadable texture. Always check for potential allergens and supervise closely, as young children may taste their paint. This isn’t medical advice; if you’re concerned, check in with your pediatrician.
For the edible sand activity made with cereal or crackers, how do you handle storage and reusing the materials safely, especially if the kids didn’t finish playing in one session?
—it’s understandable to want to keep things safe and hygienic for your child. After play, discard any edible sand that’s been in contact with mouths or wet hands to avoid germs. For dry, untouched sand, store it in an airtight container in a cool, dry place and use within a couple of days. Always check for signs of spoilage before reuse. Supervise young children closely to prevent choking or overconsumption. If allergies are a concern, double-check ingredients. This isn’t medical advice; if you have specific worries, reach out to your pediatrician.
Is it safe for a 3-year-old to do the fruit and veggie stamp activity alone while I prep for bedtime nearby, or should I always be right next to her during this type of sensory play?
It’s great that you’re considering your child’s safety during sensory play. For a 3-year-old, close supervision is recommended for the fruit and veggie stamp activity, since young children may put small pieces in their mouths or try to taste the paint, even if it’s labeled non-toxic. Set up the activity at a table within your line of sight, and if you need to step away, pause the play or involve your child in a safer bedtime prep task. Always check the size of produce pieces to avoid choking hazards. This isn’t medical advice; if you’re concerned, check in with your pediatrician.
For babies with dairy allergies, you mention using coconut yogurt as a swap for the yogurt paint activity. Are there any other safe, non-dairy alternatives you recommend that still have a similar texture for painting?
It’s great that you want to include your baby in sensory play while being mindful of dairy allergies. Besides coconut yogurt, you can try plain oat yogurt or soy yogurt, both of which have a creamy, spreadable texture similar to dairy yogurt. Unsweetened applesauce or smooth mashed banana can also work, though they’ll be a bit thinner. Always check for added sugars and potential allergens, and supervise closely during play to avoid accidental eating of large amounts. Choose unsweetened, plain varieties for the safest experience. This isn’t medical advice; if you’re concerned, check in with your pediatrician.
If my child is closer to 18 months but still mouths everything, are all the suggested activities here still appropriate, or would you recommend transitioning toward more complex or less edible options?
It’s great that you’re tuning into your child’s developmental stage and safety. At 18 months, mouthing is still very normal, so it’s best to focus on activities that use edible or taste-safe materials, like yogurt paints, cooked pasta, or cereal-based sensory bins. Avoid small, hard, or non-edible items that could pose a choking risk. Supervise closely and check ingredient lists for potential allergens. You can gradually introduce more complex textures and activities as mouthing decreases, but there’s no rush. This isn’t medical advice; if you’re concerned, check in with your pediatrician.
I noticed the article mentions edible sand for toddlers, but our family usually avoids processed cereals and crackers. Are there any more natural ingredient alternatives you suggest for making edible sand, especially ones suitable for younger babies?
It’s great that you’re mindful of natural ingredients for your little one’s play. For a more natural edible sand, try finely blending plain oats or unsweetened coconut flakes until they have a sand-like texture—these are gentle and allergen-friendly for most babies over 6 months. Cooked and cooled quinoa or millet can also work, offering a fun texture with minimal processing. Always supervise closely, check for potential allergies, and avoid honey or salt with babies under 12 months. This isn’t medical advice; if you’re concerned, check in with your pediatrician.
Do you have tips on how to adjust sensory food play routines for families who prefer not to make things at home every week? Would rotating a toy subscription box every month keep kids as engaged as these homemade ideas?
It’s understandable to want sensory play routines that don’t require weekly prep. If you prefer not to make things at home, consider rotating a set of durable, easy-to-clean sensory toys, including play food sets, textured balls, and scooping tools. A monthly toy subscription box can help keep activities fresh and engaging if you swap items and periodically introduce something new. Pair these toys with real foods on occasion so your child still explores genuine textures and smells. Always supervise young children, and check toys for small parts or allergens. This isn’t medical advice; if you’re concerned, check in with your pediatrician.
If my child has a mild aversion to sticky or slippery textures, are there any adjustments you’d recommend to the pasta sensory bin or yogurt paints to make it a gentler introduction for them?
It’s very thoughtful to support your child as they get used to new textures. To make pasta sensory bins less overwhelming, start with dry or lightly cooked pasta that’s less sticky, and let your child use utensils or tools instead of their hands at first. For yogurt paints, try offering a thick, less runny yogurt and encourage painting with brushes or sponges. Give your child plenty of time to observe and gradually touch the textures at their own pace. Always supervise closely, especially with young children, to avoid choking or mess-related slips. This isn’t medical advice; if you’re concerned, check in with your pediatrician.
I noticed some activities use yogurt, but my toddler has a dairy allergy and my newborn is still exploring solids. What are your favorite non-dairy or hypoallergenic alternatives that still work well for sensory food play and are easy to clean up?
You’re being so thoughtful about keeping play both fun and safe for your children. For non-dairy sensory play, you can use unsweetened applesauce, mashed avocado, or cooked and cooled oatmeal as gentle, hypoallergenic bases—these have interesting textures and are usually well-tolerated. Silken tofu (check for soy allergies) and pureed pumpkin are also easy to clean up and safe for little explorers. Always supervise closely, especially with your newborn, and offer only single-ingredient foods you know are safe for your family. This isn’t medical advice; if you’re concerned, check in with your pediatrician.
Do you have recommendations for making the yogurt paint activity less slippery? We have tile floors, and I’m worried about accidents if things get too messy during the birthday party.
It’s great that you want to keep play safe and fun, especially with a group of little ones. To make yogurt paint less slippery, use thick Greek yogurt or mix in a bit of cornstarch to improve the texture. Set up a large washable tablecloth or non-slip mats under the play area to catch spills. Encourage kids to stay seated while painting, and keep towels nearby to quickly wipe up any drops. For party settings, adult supervision is key. This isn’t medical advice; if you’re concerned, check in with your pediatrician.
If my toddler is really interested in pouring and scooping but my newborn is mostly watching from the side, which activity would you say is most engaging for both, or should I set up something separate for each age?
It’s wonderful that you want to include both your toddler and newborn in sensory play. For your toddler, pouring and scooping with dry oats or water in a shallow bin can be very engaging—just be sure to supervise closely to avoid choking hazards. Your newborn can safely join by watching, feeling safe textures like a soft cloth, or listening to gentle sounds nearby. Setting up the main activity for your toddler and offering simple sensory stimulation for your newborn works well at these different ages. This isn’t medical advice; if you’re concerned, check in with your pediatrician.
For families on a tight budget, which of these sensory food activities tends to be the most cost-effective for regular play? We want to add sensory play to our potty training days without spending too much.
It’s great that you want to support sensory play while being mindful of your budget. Simple activities using items you have at home—like dry rice, cooked pasta, or oats—are usually the most cost-effective and can be used multiple times. You can fill a shallow tray with one of these foods and let your child scoop, pour, or squish with their hands. For potty training days, try timing short play sessions right after bathroom trips as a reward or calming break. Always supervise closely, especially for children under three, to prevent choking or messes. This isn’t medical advice; if you’re concerned, check in with your pediatrician.
How do you recommend adding structure to incorporate sensory food activities into a daily travel routine, especially with all the excitement and changes in schedule that come with vacationing with a toddler?
It’s great that you’re thinking ahead about helping your toddler feel secure during travel. Try scheduling a short sensory food activity at a predictable time each day, like snack time, to provide consistency. Pack a small kit with safe, familiar foods (such as rice crackers or soft fruits) and a few portable tools, making sure nothing poses a choking risk or allergy concern. Use a washable mat or tray to define the play area, even in new places. Involve your child in setting up and cleaning up to create a sense of routine. This isn’t medical advice; if you’re concerned, check in with your pediatrician.
If my child has a gluten sensitivity, which edible sand ingredients are the easiest to find in most US grocery stores, and do they create a similar texture to regular graham crackers?
You’re thoughtful to look for gluten-free options that still offer a fun sensory texture. For edible sand, crushed gluten-free cereal (like plain Cheerios or Rice Chex) or gluten-free oats pulsed in a food processor are both easy to find and give a similar crumbly feel to graham crackers. Make sure to check labels for hidden gluten and possible allergens. Always supervise closely, especially with younger kids, to avoid choking or eating too much. This isn’t medical advice; if you’re concerned, check in with your pediatrician.
For the edible sand activity, is there a store-bought cereal or cracker brand that works best for texture, or do most unsweetened varieties do the trick? I am hoping to avoid anything with too much sugar and want to make sure it’s easy to pour and scoop.
It’s great that you’re looking for a low-sugar, easy-to-handle option for edible sand. For texture and pourability, unsweetened cereals like plain Cheerios, Rice Chex, or Wheat Puffs work well when crushed—just check the label for sugar content and avoid sweetened or frosted versions. Plain graham crackers are another option, but tend to be a bit coarser. For children under 1, consider allergies and always supervise during play to prevent choking. This isn’t medical advice; if you’re concerned, check in with your pediatrician.
Is there a way to make these sensory food play activities more budget-friendly for bigger families, maybe by reusing ingredients or opting for certain tools over others?
It’s great that you’re looking for ways to make sensory food play accessible for your whole family. You can reuse safe, dry ingredients like rice or pasta by storing them in airtight containers between sessions. Choose durable, washable tools such as measuring cups and spoons instead of single-use items. Consider using household items—like muffin tins or plastic containers—instead of specialized trays. Opt for fresh foods that double as snacks to minimize waste, and always supervise to ensure age-appropriate safety (watch out for choking hazards and allergens). This isn’t medical advice; if you have specific worries, please consult your pediatrician.
If my toddler has a mild wheat allergy, are there specific pasta alternatives you recommend for the cooked pasta sensory bin? I want to make sure the activity stays edible and fun without triggering a reaction, but still provides a similar texture experience.
It’s wonderful that you want to keep sensory play safe and enjoyable for your toddler. For a wheat-free, edible pasta bin, consider cooked gluten-free options like rice pasta, corn pasta, or lentil-based noodles—these are widely available and offer similar squishy textures. Always check the ingredient lists for other potential allergens. Cook the pasta until soft, let it cool completely, and supervise closely to prevent choking. Rinse thoroughly to remove excess starch for less stickiness. This isn’t medical advice; if you’re concerned, check in with your pediatrician.
Could you clarify how often you recommend scheduling these sensory food play sessions in a typical week for a 9-month-old and if there’s a preferred time of day that works best for minimizing mess and encouraging focus?
It’s great that you want to make sensory food play both enjoyable and manageable for your little one. For a 9-month-old, aim for two to three short sessions a week, each lasting 10–15 minutes, to avoid overstimulation. Late mornings or just before bath time can work well—your baby is usually alert but not too tired, and cleanup is easier. Always supervise closely, use safe, age-appropriate foods, and watch for signs your baby has had enough. This isn’t medical advice; if you’re concerned, check in with your pediatrician.
If my toddler has a dairy allergy, do you have tips for making the yogurt paint activity just as fun and safe with non-dairy options like oat or coconut yogurt? Curious if the textures or clean-up are much different.
It’s great that you’re looking for allergy-safe ways to enjoy sensory play with your toddler. Non-dairy yogurts like oat or coconut are excellent substitutes for yogurt paint—just be sure to choose unsweetened, plain varieties to avoid sticky clean-up and strong scents. Before play, check for any skin reactions by dabbing a little on your child’s wrist. Oat yogurt is usually a bit thicker and less slippery than coconut, so you may need to stir it well or chill it briefly for easier handling. Clean-up is similar for both: wipe up spills quickly to avoid residue. This isn’t medical advice; if you’re concerned, check in with your pediatrician.
How do you recommend fitting sensory food play into a daily or weekly routine for a busy household? Are there activities here that work well for quick set-up and clean-up after work or school?
It’s great that you want to make sensory food play work for your family’s busy schedule. For quick set-up and clean-up, try activities like dry pasta bins, yogurt finger painting on a tray, or sorting colorful fruits—these can be done in under 15 minutes and only need a damp cloth for cleaning up. You could set aside one or two evenings a week, or use weekends when there’s more time. Always supervise closely, especially with younger children, to avoid choking or messes. This isn’t medical advice; if you’re concerned, check in with your pediatrician.
If my toddler has a mild dairy sensitivity, would using coconut yogurt instead of regular yogurt for the yogurt paints work just as well, or does it change the texture too much for finger painting?
It’s great that you’re being attentive to your toddler’s dairy sensitivity. Coconut yogurt is often a safe and gentle substitute for regular yogurt in sensory play, and its texture is usually thick enough for finger painting. Try these steps: choose a plain, unsweetened coconut yogurt with a smooth consistency; stir it well to avoid lumps; add natural food coloring if desired; and test a small amount to see how it spreads. If it’s too runny, mix in a little cornstarch until you reach the desired thickness. Always supervise your toddler during play to ensure safety. This isn’t medical advice; if you’re concerned, check in with your pediatrician.
My toddler has a dairy allergy and I’m always nervous trying new edible play ideas. If we wanted to substitute the yogurt paint, would coconut yogurt or oat yogurt work just as well for texture and safety?
It’s completely understandable to feel cautious about allergies when exploring edible play with your toddler. Both coconut yogurt and oat yogurt can be great substitutes for dairy yogurt in sensory play—they offer a similar creamy texture and are generally safe for little ones with dairy allergies. Always choose unsweetened, plain varieties to avoid added sugars or flavors, and check ingredient labels for other potential allergens. Before starting, do a small skin test to ensure your child doesn’t react, and supervise closely during play. This isn’t medical advice; if you’re concerned, check in with your pediatrician.
Would any of these sensory food activities work well for a child who is hesitant about getting their hands messy or has mild sensory sensitivities? I want to encourage exploration but not overwhelm my toddler.
You’re thoughtful to support your child’s comfort while encouraging new experiences. Start by offering utensils or using foods with dry, less sticky textures—like dried cereal or rice—so your toddler can explore without direct contact. Allow your child to simply watch or touch with a finger before moving to whole-hand play. Gradually introduce new textures, always giving your child the option to stop if it feels too much. Keep initial sessions short, and praise any small step toward participation. Always supervise closely and avoid foods that pose a choking risk. This isn’t medical advice; if you’re concerned, check in with your pediatrician.
Do you have any tips for balancing open-ended sensory food play with more structured, educational playtime? I want to encourage creativity but also support learning specific skills, so I’m wondering how to strike the right balance.
It’s wonderful that you want to nurture both creativity and skill development in your child’s playtime. You might try alternating between open-ended sensory food play (like letting your child explore textures freely) and more guided activities (such as sorting food by color or counting pieces). Use short, playful instructions for the structured moments, but keep them brief to maintain interest. For toddlers and preschoolers, 10–15 minutes of focused activity is usually enough. Always supervise closely to avoid choking risks and use age-appropriate foods. This isn’t medical advice; if you’re concerned, check in with your pediatrician.
If my toddler is sensitive to certain textures and is hesitant to touch mushy foods like pasta or yogurt, do you have any tips to gradually introduce sensory food play without overwhelming them?
It’s completely normal to feel concerned when your toddler shows hesitation with certain textures. Start by letting your child observe you playing with the food first, showing curiosity and fun without pressure. Offer utensils or toys for them to use as a barrier, so they can explore the food without direct touch. Gradually encourage touching with just a fingertip, and celebrate small steps. Use firmer foods at first, like dry cereal or toast, and slowly work toward mushier textures as your child’s comfort grows. Always supervise sensory food play and watch for any allergic reactions. This isn’t medical advice; if you’re concerned, check in with your pediatrician.
Do you recommend rotating through these food sensory tools as part of a weekly bedtime routine, or is it better to stick to one favorite activity for consistency, especially while introducing two languages at home?
It’s understandable to want both consistency and variety, especially while supporting language development at home. For toddlers and preschoolers, try rotating 2–3 familiar food sensory tools each week rather than doing a different one every night—this balances predictability with new sensory and language experiences. You might dedicate certain nights to favorites, and others for new textures or utensils, always making sure activities are age-appropriate and supervised to prevent choking or mess hazards. Narrate actions in both languages to reinforce vocabulary. This isn’t medical advice; if you have any concerns about routines or bilingual development, check in with your pediatrician.
If my 2-year-old still puts everything in their mouth but is a bit sensitive to sticky textures, which of these activities would you recommend starting with?
It’s completely normal for toddlers to mouth objects and have texture sensitivities at this age. For a 2-year-old who prefers not-too-sticky options, start with dry sensory foods like rice, pasta, or cereal for scooping and pouring. You could also try large, easy-to-handle items like cooked (but firm) vegetable chunks during supervised play. Always supervise closely to prevent choking, and choose foods that are safe to swallow in small amounts. Gradually introduce slightly textured foods as your child becomes more comfortable. This isn’t medical advice; if you’re concerned, check in with your pediatrician.
For edible sand made from cereal or crackers, are there certain brands or types you would suggest to minimize sugar content but still get the sandy texture? I want to keep the activity as healthy as possible.
It’s wonderful that you’re mindful of both health and sensory fun for your child. For edible sand, try using plain, unsweetened cereals like Cheerios (original), puffed rice, or Wheat Puffs, or opt for low-salt whole grain crackers. Crush them finely by hand or with a rolling pin for a sandy texture. Always check ingredient lists for added sugars or salt. For little ones under one, avoid honey and ensure all pieces are finely ground to prevent choking. This isn’t medical advice; if you have specific dietary concerns, check in with your pediatrician.
How do you recommend safely storing leftovers from the sensory food activities, like extra colored pasta or unused yogurt paint? I’d love to minimize waste and set up play sessions in advance, but I worry about spoilage.
It’s great that you want to reduce waste and plan ahead while keeping things safe for your child. For colored pasta, let it dry completely after play, then store it in an airtight container in a cool, dry place—just check for mold before each use and discard if it smells off. For yogurt paint or other perishable items, refrigerate immediately in sealed containers and use within a day or two, but never reuse anything that’s been touched by your child’s hands or mouth. Always supervise closely and avoid storing foods with allergens your child could react to. This isn’t medical advice; if you’re concerned, check in with your pediatrician.
Do you have tips for keeping sensory food play, like the fruit and veggie stamps or yogurt paints, manageable in the evenings when everyone is tired? I want to encourage language development in both languages but need ideas that fit into a quick bedtime routine.
It’s wonderful that you want to support language development, even when evenings are busy and everyone is winding down. Here are a few manageable tips: Choose just one simple activity, like yogurt painting with a single fruit or veggie, and set it up on a tray for easy cleanup. Use a plastic placemat or towel to contain spills. Focus on narrating actions and naming colors or shapes in both languages as you play, even if it’s for just 5–10 minutes. Involve your child in the clean-up with phrases in both languages. Opt for soft textures and age-appropriate foods to avoid choking hazards, and always supervise closely. This isn’t medical advice; if you’re concerned, check in with your pediatrician.
Can you suggest any good non-dairy or allergy-friendly alternatives for the yogurt paints? Our baby is sensitive to dairy, but I would love to try the finger painting idea for sensory exploration.
It’s wonderful that you want your baby to enjoy sensory painting while keeping their allergies in mind. You can try unsweetened coconut or oat-based yogurts as a base, making sure they’re free from other allergens your baby might have. Another safe option is plain, unsweetened applesauce or mashed banana for a similar texture. Add a bit of natural food coloring if you’d like more color. Always supervise closely, and do a small patch test if trying a new ingredient. This isn’t medical advice; if you’re concerned, check in with your pediatrician.
Do you have any thoughts on whether babies are likely to get meaningful amounts of iron from tasting iron-fortified cereal during edible sensory play, or is puree-based play (like stamping with fruits) just as good from a nutrition angle?
—it’s natural to wonder if sensory food play helps with nutrition as well as exploration. Most babies will only get a tiny amount of iron from tasting or mouthing iron-fortified cereal during play; it’s not likely to meet their dietary needs that way. Puree-based play with fruits offers vitamins and textures but usually contains little iron compared to fortified cereals. For meaningful nutrition, it’s best to offer iron-rich foods as part of regular meals rather than relying on sensory play. Always supervise closely to prevent choking, especially with babies under 12 months. This isn’t medical advice; if you have concerns about your baby’s iron intake, please consult your pediatrician.
For families with multiple kids at different stages, is it safe to let them play together with these sensory food activities, or do you recommend separate setups for different ages to minimize accidental choking risks?
It’s great that you’re thinking about safety with kids of different ages during sensory food play. To minimize choking risks, offer age-appropriate foods—soft, easily mashed options for babies, and avoid small, hard foods for little ones. Supervise all children closely, keeping an eye on younger siblings who may mouth items. Consider separate setups or a divided play space so older kids can enjoy more advanced activities without risking the younger child’s safety. Always clean up small pieces quickly. This isn’t medical advice; if you’re concerned, check in with your pediatrician.
If my 7-month-old is not very interested in touching different textures yet, would starting with the fruit and veggie stamps be less overwhelming than the pasta bin or yogurt paint? Any suggestions for babies who are more hesitant about messiness?
It’s completely normal for some babies to be cautious about new textures. For a 7-month-old who is hesitant, starting with fruit and veggie stamps is a gentle option—they can safely hold the produce and you can offer quick, low-mess experiences. Try sitting together with a damp cloth nearby, use larger pieces to avoid choking hazards, and let your baby watch before touching. Keep sessions short and positive, and never force interaction. Always supervise closely to prevent mouthing small or hard pieces. This isn’t medical advice; if you’re concerned, check in with your pediatrician.
My child has a mild dairy sensitivity, so the yogurt paints sound tricky. Are there any non-dairy alternatives you’d suggest that have a similar consistency and are still safe if tasted?
It’s wise to be cautious about food sensitivities during sensory play. For a yogurt paint alternative, try using unsweetened coconut yogurt or oat milk yogurt, as both offer a similar creamy texture and are typically safe if tasted. You can also mix corn starch with water and a bit of food coloring to create a ‘taste-safe’ paint, though the consistency is a bit different. Always supervise closely to prevent large mouthfuls, and watch for any allergic reactions with new foods. This isn’t medical advice; if you’re concerned, check in with your pediatrician.
My toddler sometimes gets overwhelmed by sticky textures. For the yogurt paints activity, do you have tips for helping sensitive kids slowly get used to the feeling without creating frustration or mess everywhere?
It’s great that you want to support your toddler’s comfort with sensory play. Start by letting your child explore yogurt paints with a spoon, paintbrush, or even a gloved hand so they can engage without immediate skin contact. Offer encouragement and keep sessions short, gradually increasing how long you play as your toddler gets more comfortable. Allow your child to watch you use your hands first, showing that it’s safe and fun. Set up the activity in a contained area with a washable mat and keep wipes or a damp cloth nearby for quick cleanups. Always supervise closely and trust your child’s cues. This isn’t medical advice; if you’re concerned, check in with your pediatrician.
I noticed you mention using small objects for burying in the edible sand. Are there any particular types or sizes of objects you would recommend that are safe and don’t pose a choking hazard for younger toddlers?
You’re absolutely right to consider safety when choosing objects for sensory food play. For younger toddlers, stick with large items—at least 1.25 inches wide and longer than 2.25 inches (about the size of a toddler’s fist or bigger). Sturdy plastic or wooden blocks, chunky animal figurines, or large textured balls can work well, as long as there are no sharp edges or loose parts. Always supervise closely and double-check for cracks or peeling paint. Avoid anything small enough to fit entirely into a toddler’s mouth. This isn’t medical advice; if you’re concerned, check in with your pediatrician.
We find that our child sometimes gets overwhelmed with too many textures at once, especially when both grandparents are involved in setting up. Is it better to introduce just one sensory food activity per day, or can kids benefit from combining options like pasta bins and yogurt paints in a single session?
It’s completely normal to worry when your child seems overwhelmed by sensory play. For children who are sensitive to multiple textures, it’s usually best to start with just one sensory food activity at a time, especially for toddlers and preschoolers. Gradually introduce new textures over different sessions, observing how your child responds. If you’d like to combine activities, try offering them in separate bins or trays with clear boundaries, so your child can choose what to explore. Always supervise closely and keep an eye out for signs of discomfort or stress. This isn’t medical advice; if you’re concerned, check in with your pediatrician.
How do you usually fit sensory food play into a daily or weekly routine at home? Is it best as a morning activity, or do you find it helps with winding down before nap or bedtime?
It’s great that you’re thinking about how to fit sensory food play into your family’s routine. Sensory food play can work well at different times of day, but many parents find it most helpful in the morning or before lunch, when kids have more energy and patience for messy exploration. Try setting aside 15–30 minutes two or three times a week, using easy-to-clean surfaces and safe foods appropriate for your child’s age. Avoid sugary or stimulating foods before naptime or bedtime, as these can make winding down harder. Always supervise closely, especially with young toddlers. This isn’t medical advice; if you’re concerned, check in with your pediatrician.
If a toddler is sensitive to certain textures, like doesn’t like mushy or sticky foods, which activities from your list might be the best place to start? I want to help my son get more comfortable without overwhelming him.
It’s great you’re supporting your son as he explores new textures at his own pace. For toddlers sensitive to mushy or sticky foods, begin with activities using dry or less-messy materials, such as exploring dry pasta, cereal, or rice, as suggested in the article. Offer tools like scoops or tongs so he can engage without direct hand contact. Gradually let him help pour or mix drier ingredients, increasing comfort before introducing softer textures. Always supervise closely to prevent choking and manage any small parts. Remember, gentle exposure and patience are key—this isn’t medical advice, so if you have concerns, reach out to your pediatrician.
My toddler has a tendency to put everything in her mouth, so I love the idea of edible sensory bins. For the cooked pasta activity, do you find certain shapes less slippery or easier for little hands to grasp when practicing with tongs or spoons?
It’s great that you’re thinking about safe, engaging ways for your toddler to explore food play. For cooked pasta sensory bins, larger shapes like rigatoni, penne, or rotini are usually less slippery and easier for little hands to grasp with tongs or spoons than small or smooth noodles. Cook the pasta al dente so it holds its shape and isn’t too mushy. Let it cool fully, and supervise closely to minimize choking risks. Toddlers under age three should always be monitored with any sensory food activity. This isn’t medical advice; if you’re concerned, check in with your pediatrician.
I have concerns about potential food allergies with some of these activities, especially since my child’s friends might visit for quiet playdates. Do you have recommendations for safe substitutions or general guidelines to help keep everyone safe?
You’re absolutely right to prioritize safety around food allergies, especially for group play. First, ask parents about any allergies before planning activities. Choose hypoallergenic foods like plain rice, cooked pasta, or vegetable-based doughs (avoiding common allergens like nuts, dairy, and eggs). Always supervise kids closely and consider using non-food sensory materials, such as water beads or kinetic sand, when allergies are a concern. Clean surfaces and hands before and after play. This isn’t medical advice; if you’re concerned, check in with your pediatrician or an allergist.
For the edible sand activity, how long does the homemade sand usually keep before it goes stale, and do you store leftovers in the fridge or pantry between play sessions?
—wanting to keep sensory play both fun and safe is so important. Homemade edible sand (often made with flour, cereal, or graham crackers) usually keeps for 1–3 days if stored in an airtight container. If it contains perishable ingredients like coconut or butter, store it in the fridge; otherwise, a cool, dry pantry spot is fine. Always check for signs of moisture, mold, or off smells before each use, and supervise little ones closely to prevent choking. This isn’t medical advice; if you’re concerned, check in with your pediatrician.
How do you recommend managing food allergies when setting up edible sensory play, especially if there are siblings or friends with different dietary needs? Are there certain activities from the list that are easier to adapt for allergy concerns?
You’re wise to think ahead about food allergies during sensory play, especially with multiple kids involved. First, check in with all families about allergies before planning. Choose single-ingredient bases like plain oats, cooked pasta, or rice, which are often safer and easier to adapt—these options from the article can be swapped for allergy-friendly versions (like gluten-free or rice alternatives). Set up separate trays or color-coded bins for different dietary needs and supervise closely to prevent sharing or cross-contact. For very young children, avoid common allergens and stick to larger, non-chokable pieces. This isn’t medical advice; if you’re concerned, check in with your pediatrician.
My toddler loves the edible sand, but I worry about cleanup and attracting ants. Do you have any tips for managing mess and keeping bugs away when using food-based sensory bins indoors?
It’s completely understandable to want sensory play to be fun without creating extra mess or pest problems. Try using a washable tablecloth or a large tray under the sensory bin to catch stray sand for easy cleanup. Encourage your toddler to keep the edible sand inside the bin by modeling and gently reminding. After play, vacuum or sweep the area thoroughly and wipe surfaces with a mild cleaner to remove any residue. Store leftover edible sand in an airtight container and put it away promptly. Always supervise closely to ensure safety and prevent accidental spills. This isn’t medical advice; if you’re concerned, check in with your pediatrician.
With busy family schedules, I try to balance screen time and hands-on play. How often do you recommend incorporating sensory food play into our routine, and is there an ideal time of day for these activities to best support development?
It’s great that you’re prioritizing hands-on play alongside busy schedules. For most toddlers and preschoolers, aiming for 2–3 short sensory food play sessions per week—about 15–20 minutes each—can be very beneficial for development without feeling overwhelming. Late mornings or before dinner work well, as children are awake and can connect the experience to positive mealtimes. Always supervise closely, especially with small foods or new textures, to ensure safety. This isn’t medical advice; if you’re concerned, check in with your pediatrician.
For toddlers who are sensitive to messy textures, do you have suggestions for making the cooked pasta sensory bin less slimy? My son sometimes gets upset when things feel sticky or slippery on his hands.
It’s understandable to want sensory play to be comfortable for your son, especially if he is sensitive to certain textures. To make a cooked pasta sensory bin less slimy, try rinsing the pasta thoroughly under cool water and tossing it lightly with a bit of cornstarch or flour to absorb excess moisture. You can also let the pasta air-dry for a while on a tray, so it loses some of its stickiness. Start with a small amount and encourage your child to use utensils or touch with just a fingertip at first. Always supervise closely, as pasta can be a choking hazard for toddlers. This isn’t medical advice; if you’re concerned, check in with your pediatrician.
For parents focused on iron intake, would you recommend prioritizing certain cereals over others for the edible sand bin, or are there specific puree options that can match or exceed cereals for iron content in sensory play?
It’s great that you’re thinking about iron intake during sensory food play. If you want to use cereals for an edible sand bin, choose iron-fortified options like plain infant cereals or unsweetened fortified oat or rice cereal—these tend to have higher iron content. For purees, look for iron-rich sources such as pureed lentils or beans, or offer pureed meats if your child is ready. Always check age-appropriateness: avoid choking hazards and choose single-ingredient options for younger babies. This isn’t medical advice; if you’re concerned, check in with your pediatrician.
Between these sensory ideas, which ones would you say are the least expensive and easiest to set up for a first-time parent on a budget with a 7-month-old?
It’s great that you want to offer sensory play while being mindful of cost and setup as a first-time parent. For a 7-month-old, the safest, easiest, and least expensive ideas include edible finger painting with plain yogurt or mashed fruits on a tray, and letting your baby explore cooked pasta or soft cooked veggies (just be sure all pieces are soft and large enough to avoid choking). Always supervise closely and avoid small or hard foods. Sensory bins with oats or cereal are simple, too—just make sure ingredients are age-appropriate and allergen-safe. This isn’t medical advice; if you’re concerned, check in with your pediatrician.
If a child is nervous about trying new textures, like the pasta or yogurt activities, do you have tips for easing them into it without overwhelming them? I sometimes watch a kid who is sensitive to sticky or slimy feelings, and I want to make sensory play positive.
It’s wonderful that you want to make sensory play comfortable for a sensitive child. Start by letting them observe or touch the new textures with a tool (like a spoon or small toy) before using their hands. Offer a dry towel nearby so they can wipe their hands anytime. Gradually introduce textures, starting with less sticky options (like dry pasta), and move at their pace. Always encourage, but never force participation, praising any small steps they take. Make sure all materials are age-appropriate, non-toxic, and supervise closely. This isn’t medical advice; if you’re concerned about sensory issues, check in with your pediatrician.
Can you suggest budget-friendly alternatives for the edible sand activity, especially for families who might not have access to a blender or food processor in the mornings?
—it’s wonderful to see you thinking about accessibility and safety. For edible sand without a blender, try crumbling plain crackers or dry cereal by hand or in a sealed bag using a rolling pin. You can also use instant oatmeal or finely shredded coconut, both of which offer interesting textures and are generally safe for young children (check for allergies). Always supervise closely, especially with toddlers, to prevent choking. This isn’t medical advice; if you’re concerned, check in with your pediatrician.
Could you share your thoughts on how often to incorporate sensory food play into a weekly routine for a toddler? Is it better to do it every day, or does too much food play risk turning mealtimes into more of a game than a meal?
It’s great that you’re thinking about how food play fits into your toddler’s routine. For most toddlers, sensory food play 2–3 times a week is plenty to encourage exploration without making mealtimes feel like playtime. Try to keep sensory play and regular meals separate, so your child learns when it’s time to eat versus play. Always supervise closely, especially with choking hazards or allergens. Pay attention to your child’s cues—if they’re starting to blur the lines at meals, scale back on food play days. This isn’t medical advice; if you’re concerned, check in with your pediatrician.
We have twins with pretty different sensory preferences—one nibbles everything and the other gets overwhelmed by sticky textures. Which of these activities might suit both without causing too much sensory overload or stress for the more sensitive twin?
It’s great that you’re tuned in to your twins’ unique sensory needs. For both, start with dry or crumbly food play like rice, cereal, or dry pasta—these offer lots of sensory input without being sticky, which may feel safer for your more sensitive child. Let each twin explore at their own pace and have wipes or towels nearby for easy clean-up. Use shallow trays and supervise closely to prevent choking, especially for younger children. You can always introduce new textures gradually when they’re comfortable. This isn’t medical advice; if you’re concerned, check in with your pediatrician.
My toddler has a mild dairy sensitivity. For the yogurt paints, do you have experience with any non-dairy alternatives that still work well for texture and color?
It’s great that you’re looking for safe ways to adapt sensory activities for your toddler’s needs. For yogurt paints, you can try plain coconut yogurt or soy yogurt, as both have a creamy texture and mix well with natural food coloring. Oat yogurt is another option, but check that it’s unsweetened and not too runny. Always supervise closely, especially if trying a new food, and test a small amount on your child’s skin first to check for any reaction. This isn’t medical advice; if you’re concerned, check in with your pediatrician.
I noticed the cooked pasta sensory bin can get pretty messy. How do most parents handle cleanup afterward, and are there any tips for minimizing pasta sticking to clothes or the floor, especially with younger babies who are still sitting with support?
You’re not alone—messy sensory play is a common concern, especially with little ones just learning to sit. Try placing a large, washable mat or old sheet under the play area to catch stray pasta. Dress your baby in a smock or old clothes that can go straight in the wash. Keep wipes and a damp cloth nearby for quick hand and face cleaning. For babies who are still wobbly, holding play in a high chair with a tray can help contain both the pasta and your child. Always supervise closely, and remember it’s okay for things to get a bit messy—it’s all part of the learning. This isn’t medical advice; if you’re concerned, check in with your pediatrician.
If my toddler has some tactile sensitivity and resists touching sticky or mushy foods, which of these sensory play options would be a gentle introduction that might encourage more participation without overwhelming him?
It’s wonderful that you’re looking for gentle ways to support your toddler’s sensory exploration. Start with dry, less messy options like playing with uncooked rice or pasta, which offer interesting textures without stickiness. Use tools—such as scoops, tongs, or spoons—so your child can interact without direct hand contact at first. Gradually introduce slightly messier items, like play dough or dry oats, as your child becomes more comfortable. Always supervise closely and choose age-appropriate materials to prevent choking or allergic reactions. This isn’t medical advice; if tactile sensitivity persists or worsens, consider consulting your pediatrician.
How would you recommend fitting sensory food play into a daily routine for a 10-month-old? Is there an ideal time of day, like before or after meals, to help with both mess management and encouraging interest in foods?
It’s great that you want to encourage your 10-month-old’s curiosity about food and textures. At this age, try scheduling sensory food play when your child is alert but not too hungry or tired—often mid-morning or just before a meal works well. Use a washable mat and offer safe, soft foods like banana slices or mashed avocado, always supervising closely to prevent choking. Limit sessions to 5–10 minutes to avoid overwhelm, and keep clean-up supplies nearby for quick tidying. This isn’t medical advice; if you’re concerned, check in with your pediatrician.
We have a wide age range at home, from a baby exploring by mouthing everything to a preschooler who loves to build. Are there ways to adjust these sensory food activities so siblings of different ages can play together safely and still both feel engaged?
It’s wonderful that you want both your baby and preschooler to enjoy sensory food play together. Try setting up a shared play area with large, soft food items like cooked pasta or banana pieces—these are safe for mouthing and easy for building. Offer the preschooler extra tools like cups or blunt child-safe utensils to create structures, while the baby explores with their hands. Always supervise closely, and avoid foods that pose choking risks or common allergens for your baby’s age. This isn’t medical advice; if you have specific concerns, check in with your pediatrician.
We are raising our child in a bilingual home and I’m curious if you recommend introducing both languages equally during these sensory food playtimes, or focusing on one language for bedtime wind-down?
Your thoughtful approach to supporting your child’s language development is wonderful. During sensory food play, you can comfortably introduce both languages—describe textures, colors, and actions using a mix, which boosts vocabulary and cognitive flexibility in young children. For bedtime wind-down, using one language can help create a calming, predictable routine, supporting relaxation and emotional security. Always use age-appropriate language and closely supervise to ensure safety with small foods or tools. Every child is different; if you have specific concerns about speech or language development, this isn’t medical advice—consider checking in with your pediatrician or a speech-language specialist.
For parents concerned about iron intake in the first year, would you suggest prioritizing cereal-based sensory bins or purees as part of a food play routine? I’d like to know if one approach might fit better into a typical feeding schedule.
You’re thoughtful to consider both sensory play and iron intake for your baby. For infants under 12 months, offering iron-fortified purees during regular mealtimes is generally safer and better supports nutrition, as purees fit naturally into feeding routines and reduce choking risks. Cereal-based sensory bins can be fun for older babies (closer to 12 months), but should always be supervised due to small parts and potential mess. You might reserve cereal bins for playtime, not meals, and focus on purees for iron. This isn’t medical advice; please ask your pediatrician about the best feeding strategies for your child.
Do you have suggestions for adapting the fruit and veggie stamping activity for older toddlers or preschoolers so it stays engaging and helps keep building their motor skills as they grow?
—it’s wonderful that you want to keep sensory play interesting and skill-building as your child grows. For older toddlers and preschoolers, try offering a wider variety of fruits and veggies to experiment with different shapes and textures. Encourage your child to use tongs or tweezers to pick up and dip the stamps, which boosts fine motor control. Let them create patterns or pictures with the stamps, which can add a planning element and build spatial awareness. Always supervise closely and make sure small pieces don’t pose a choking hazard. This isn’t medical advice; if you have concerns, check in with your pediatrician.
We have both plain and flavored yogurt at home. Would using flavored yogurt for the ‘yogurt paints’ activity still be okay, or would the added sugar or flavors make it too sticky or distracting for sensory play purposes?
It’s great that you’re thinking carefully about your child’s sensory play experience. Using flavored yogurt for the ‘yogurt paints’ activity is generally fine, especially for toddlers and preschoolers, but here are a few things to consider. First, flavored yogurts can be stickier and messier due to extra sugar, so lay down a washable mat and keep wipes nearby. Second, some children may be more interested in tasting the paint, which is safe with yogurt but can be more tempting with sweet flavors. Third, check the ingredient list for potential allergens or artificial additives if your child is sensitive. Lastly, always supervise closely. This isn’t medical advice; if you’re concerned, check in with your pediatrician.
How long do the yogurt paints or edible sand bins hold up before they need to be tossed? I’m trying to stick to a budget during potty training, so any storage or reuse tips would be helpful.
You’re smart to think about safety and budget while encouraging sensory play. Yogurt paints should be used the same day and discarded after play—dairy spoils quickly, especially at room temperature. Edible sand bins made from cereal or crackers can last 1–2 days if stored in an airtight container in a cool, dry place, but toss them if they get wet or sticky. Always supervise, especially with potty trainees, to avoid contamination. This isn’t medical advice; if you’re concerned, check in with your pediatrician.
For the yogurt paints activity, how do you keep it from turning into a major mess, especially if my 15-month-old starts flinging the yogurt everywhere? Any clean-up or set-up strategies would be great.
It’s completely normal to worry about messy play with a 15-month-old! To keep yogurt painting manageable, try spreading a large, washable mat or old sheet under your child’s play area and dress them in clothes you don’t mind getting stained. Use a shallow tray to help contain the yogurt and offer just a small amount at a time. Keep damp washcloths or wipes nearby for quick clean-ups, and if possible, set up near a sink or outdoors. Always supervise closely to ensure safety and prevent slipping. This isn’t medical advice; if you’re concerned, check in with your pediatrician.
Do you have suggestions for adjusting these sensory food activities for a 1-year-old who is still very cautious about new textures? I worry that he might be overwhelmed, especially with the pasta or edible sand.
It’s completely normal to worry about overwhelming your cautious one-year-old with new textures. Start with simple, familiar foods—try just a damp washcloth or a small bowl of dry cereal first. Gradually introduce new textures by offering only a little at a time, letting your child explore with their hands before tasting. For edible sand or pasta, use larger shapes to avoid choking hazards, and supervise closely. Keep sessions short and stop if your child seems distressed. This isn’t medical advice; if you’re concerned, check in with your pediatrician.
For babies who are sensitive to certain textures, do you have suggestions for gradually introducing sensory food play without overwhelming them? Which of these activities might be gentlest for a cautious 10-month-old?
It’s wonderful that you want to support your baby’s comfort with new textures. For a cautious 10-month-old, start with dry, familiar foods like plain rice cereal or soft, mashed fruits, letting your baby touch them with just fingertips at their own pace. Offer a shallow tray with a thin layer of food so they can explore without being immersed. You might also try cooled, cooked pasta or teething biscuits, which are safe to mouth and easy to clean up. Always supervise closely, avoid choking hazards, and stop if your baby seems distressed. This isn’t medical advice; if you’re concerned, check in with your pediatrician.
For the cooked pasta sensory bin, do you have any advice for reducing the mess if we want to try this indoors, especially with two kids close in age? I worry about slippery floors and bits of pasta ending up everywhere, so any cleanup strategies would be helpful.
It’s completely understandable to want sensory fun without a huge mess, especially with two little ones. Try placing a large plastic tablecloth, shower curtain, or washable mat under the sensory bin to catch stray pasta and make cleanup easy. Keep the bin on a low table or directly on the floor, and limit the amount of pasta to what’s manageable for little hands. Have damp washcloths and a towel nearby for quick wipe-ups, and encourage hand washing before and after play. Always supervise closely to prevent slipping or mouthing. This isn’t medical advice; if you’re concerned, check in with your pediatrician.
We have a very small kitchen with limited counter space. Can you recommend which of these sensory food play ideas work best for families who need quick clean-up and minimal set-up? Storage for leftover materials is also a challenge for us.
It’s completely understandable to want sensory food play that fits your space and storage needs. For minimal set-up and easy clean-up, try activities like dry cereal scooping or playing with cooked pasta in a large bowl on a towel—both require few materials and can be cleared quickly. Use resealable bags or small containers to store leftovers, keeping everything compact. You might also choose activities that don’t involve sticky or wet ingredients, such as sorting dried beans or rice (always supervise closely to prevent choking in little ones). This isn’t medical advice; if you’re concerned, check in with your pediatrician.
Are any of these sensory food play options especially good for minimizing clean-up, or can they be set up in a way that makes clean-up easier? I watch toddlers in a small apartment, so messes can be tricky to manage.
It makes sense to want fun sensory play without a big mess, especially in a small space. Try activities like dry pasta bins or bean scooping—these are less sticky and easier to sweep up than wet or gooey options. Use a large tray, shallow bin, or even a shower curtain liner underneath to catch spills and make clean-up easier. Stick with foods that don’t crumble or stain, and offer one or two items at a time to keep things contained. Always supervise closely, since toddlers explore with their mouths and small foods can be a choking risk. This isn’t medical advice; if you’re concerned, check in with your pediatrician.